Tessa Spanton SWA Artist, tutor, writer


TESSA SPANTON SWA ARTIST, WRITER AND TUTOR

Welcome to my blog.
This is where I write about some of the things that inspire my work,
news of exhibitions and works in progress

Saturday, 16 August 2014

Pack Smart


Torwards Godrevy    (c) Tessa Spanton
This little watercolour sketch was painted out of doors  on holiday
size 1 1/2 x 6 in
   
A little sketch done on a day out or on holiday holds  memories and a lasting reminder of the place.
I wrote two articles about painting out of doors. The first of these was in the September issue of the Leisure Painter magazine 2014. It has the title Pack Smart and offers ideas for getting started painting outdoors and how to travel light.

I put together several kits: The Micro, the Mini, The Essential and extras  are light enough not to put me off taking them out with me.
 The Micro kit weighs about the same as a banana. It includes a postcard sized watercolour pad, a water brush and various recycled things such as some blister packaging from pills or throat sweets, the lid from some food packaging and a small square plastic box that had Fererro Rocher chocolates in it. Well someone had to eat them!

The Micro Kit


The Mini Kit    1.Closed    2. Open
This includes two of my favourite items. A good quality folding brush made by Pro Arte and Winsor and Newton's amazing field box filled with my own choice of their Artist's colours. I have several of Pro arte's folding brushes. The one below is a round and the size is around 10. I also have a smaller size round, a flat and a filbert. I used the flat for the sketch above.
The field box has it's own built in water bottle, palette areas and water container that doubles up to keep the box closed when not in use. Remember to empty it if you take it through customs.


The Esssential 
Mini kit plus clip folder, tin for pencils, waterbrush etc and 1/8th imp cartridge and watercolour paper.


Plus sometimes a very lightweight fishing stool


The Full Works  (sometimes the fishing stool comes too.) I use this if I want to work larger and don't have to walk too far. I would only carry this with me if I am going out with the intention of painting. It holds 1/4 imp paper, a water bottle, a collapsing water pot and lots of brushes. There is room to stash the mini kit as well. The case is made by Mapac and has a comfortable shoulder strap.


My second article Smart Tools was in  October 2014 and the blogpost is here
To find out more Leisure Painter is available from some newsagents or online here as a hard copy or digital version

Monday, 26 May 2014

The Desert Collection in the Algarve


 Sandstone Cliffs Praia de Falesia, Algarve   1 and 2
     watercolours by Tessa Spanton (c)


Winsor and Newton Desert Collection limited edition professional watercolours.
Transparent  Phthalo sapphire,  Indian red deep, transparent orange,
Opaque  yellow titanate, gold brown with mixes shown above,
and dark brown ( shown below right)

I bought these paints to take to the Algarve with me as I thought they looked ideal for the reds and ochres of the sandstone cliffs.
Phthalo sapphire is a beautiful blue that is complementary to the transparent orange. They really sizzle next to each other. The transparent orange is an intense colour bordering on red,
I don't usually buy tubes of brown as I prefer to mix my own and the gold brown looks similar to gold ochre but I decided to buy them all. I wanted to explore the colour interactions when set next to one another and to see what mixes I could make from them.


I also made greens from this group. I used these for the pines growing on the cliffs. The greens produced are fairly muted.


above  View from Porto Bay Falesia watercolour Tessa Spanton (c) painted en plein air.

I have tested how the colours react with each other on wet watercolour paper,
 and made some comparisons with other colours I have, i will put these and my conclusions in another post.

Saturday, 3 May 2014

The Market in Funchal Madeira


Mercado dos Lavradores in Funchal, Madeira, Portugal


I did the under painting using FW inks on wet 200lb Bockingford paper. These are intense colours and I used then straight from the bottle. It comes with a handy dropper attached to the lid.
Onto this I collaged some paper torn from a magazine. I wanted some text in Portuguese and found some in a magazine I had brought back from Madeira. Even better there was an article about the market written in both Portuguese and English. I used pieces of this for the floor.


I worked on top of these using Atelier Interactive acrylics with plenty of flow medium. These are slower drying than acrylic paints usually are so I had plenty of time to blend colours. I spent several days on these paintings adjusting colours and tones, a luxury I don't usually have when painting on silk. I worked on them as a pair.
I mounted them like watercolours and framed them in light ash frames.
Here they are labelled and ready to be submitted to the Society of Women Artists exhibition at the Mall Galleries complete with paperwork.
Today 2 weeks later the letter arrived with the form with the result. As I opened it I am wondering 'would there be an A or a R written next to the titles?'  Good news this time, both have been accepted.


Friday, 18 April 2014

Business cards

Usually I make my own business cards using Publisher and printing them out.
Recently I tried the free sample pack of 10 cards offered by Moo.com  click here postage is also free.
There are various templates on offer, I chose to make my own. I put a cropped image of one of my oil pastel paintings with some text on one side and a whole image of a silk painting on the other side. The Moo logo appears on the side with the full image. When you place an order you can pay a bit more if you would prefer it to be logo free. It was all fairly easy to do. I had one or two queries and found the people at Moo very helpful over the phone.


I then tried another batch of Moo cards through Folksy, 50 cards for the cost of the postage only.
This time it is the Folksy logo that appears on the image side. As this logo is multi coloured I didn't want it on the main image. It is possible to avoid this, just a bit more complicated. I made up the text side in Publisher and converted it to a PDF file. I loaded this to the image side and zoomed out a bit so that the logo didn't cover my text. I much prefer the logo with the text  as this is where the web address of my Folksy shop is. I then put the full image on to Moo's text side.
The only drawback is that I couldn't use the Printfinity option doing it this way. Prinfinity means you can have a different image on each card.
I chose Moo Classic, 350gsm card with a silky finish from a sustainable source.
I am really pleased with the results.


Thursday, 3 April 2014

Dorking Group of Artists Spring Exhibition


This flier shows part images of some of the works that will be on show. One of mine is Lavender with ox eye daisies, centre left. It is watercolour with aquarelle sticks,

Sunday, 23 March 2014

Silk Scarf Painting Affordable Art Fair London and Tutorial


This scarf is back from the microwave and this is the first glimpse of how it turned out.

I tutored 2 groups sponsored by fashion house Gudrun Sjoden at the Affordable Art Fair in Battersea London. We used Arty's Quick Colour and ponge 5 silk scarves.
 Over 2 sessions of around 1 hour each about 34 damp silk scarves were folded, twisted or scrunched and painted using the dye direct from the little nozzles on the tubes of colour. This product though a bit pricey compared with some steam fix paints is very convenient and useful for groups where time and space is limited as you don't need paint brushes, pots or palettes.
 The colours were fixed in a squad of microwaves up on another level and ferried up, microwaved and brought back by a team of helpers. The damp scarves were wrapped in paper towels, placed in a plastic microwavable container and microwaved for about 3 minutes. I have put more info at the bottom of this post.


Tutorial 
You will need
Silk scarf  Chinese silk Pongee 5 weight and Arty's Quick Colour steam fixable dye
disposable gloves
plastic sheet to work on
microwavable container eg plastic take away container or glass Pyrex bowl
kitchen paper or couch roll

Remove the label from the scarf.
Wet the scarf and blot off excess water. Then EITHER
1. Scrunch it into a loose ball
2.Twist it along it's length till it folds back on itself
3. Fold it in 4 lengthwise
Drip colours on straight from the bottle. They will spread and mix slowly.
For 1 or 2 do this in the microwavable container. For 1 squish the ball to help the colour spread. Open it up and apply more colour as needed then screw it up and squish it again.
For 3  Place flat on polythene and when you have applied the colour, sandwich carefully between sheets of kitchen paper, loosely roll it up then transfer to the container.

Fixing the colour
These dyes can be made permanent by fixing from damp in the microwave.
Place a sheet of kitchen roll in a microwavable container, put the damp scarf on that and cover with another piece of kitchen roll. Or for 1 and 2 wrap in cling film and secure loosely with a rubber band. Microwave on medium heat for around 3 minutes till dry. Open the package after about 2 min, take care because of the hot steam. If you used method 1 open the scarf out and re scrunch so that any damper parts are on the outside of the ball. Methods 2 and 3 just turn the package over. Now microwave in 30 sec bursts and check the silk. If it's still damp the colour won't be properly fixed. WARNING if you microwave for much time after the silk is dry the silk may become scorched or the plastic container may start to melt and leave bits of molten plastic on the silk. So keep checking till the silk is just dry.

If the work had already dried before it was fixed it can't be microwaved. Instead wrap it loosely in foil and steam it like a pudding for about 1 hour. Make sure the parcel is water tight and don't let the pot boil dry.
Rinse, blot in a towel and iron damp.

Tuition
If you would like details of silk painting classes, my work and exhibitions or to contact me go to  www.saa.co.uk/art/tessaspanton or find me on facebook www.facebook.com/tessaspantonartist  

Monday, 10 March 2014

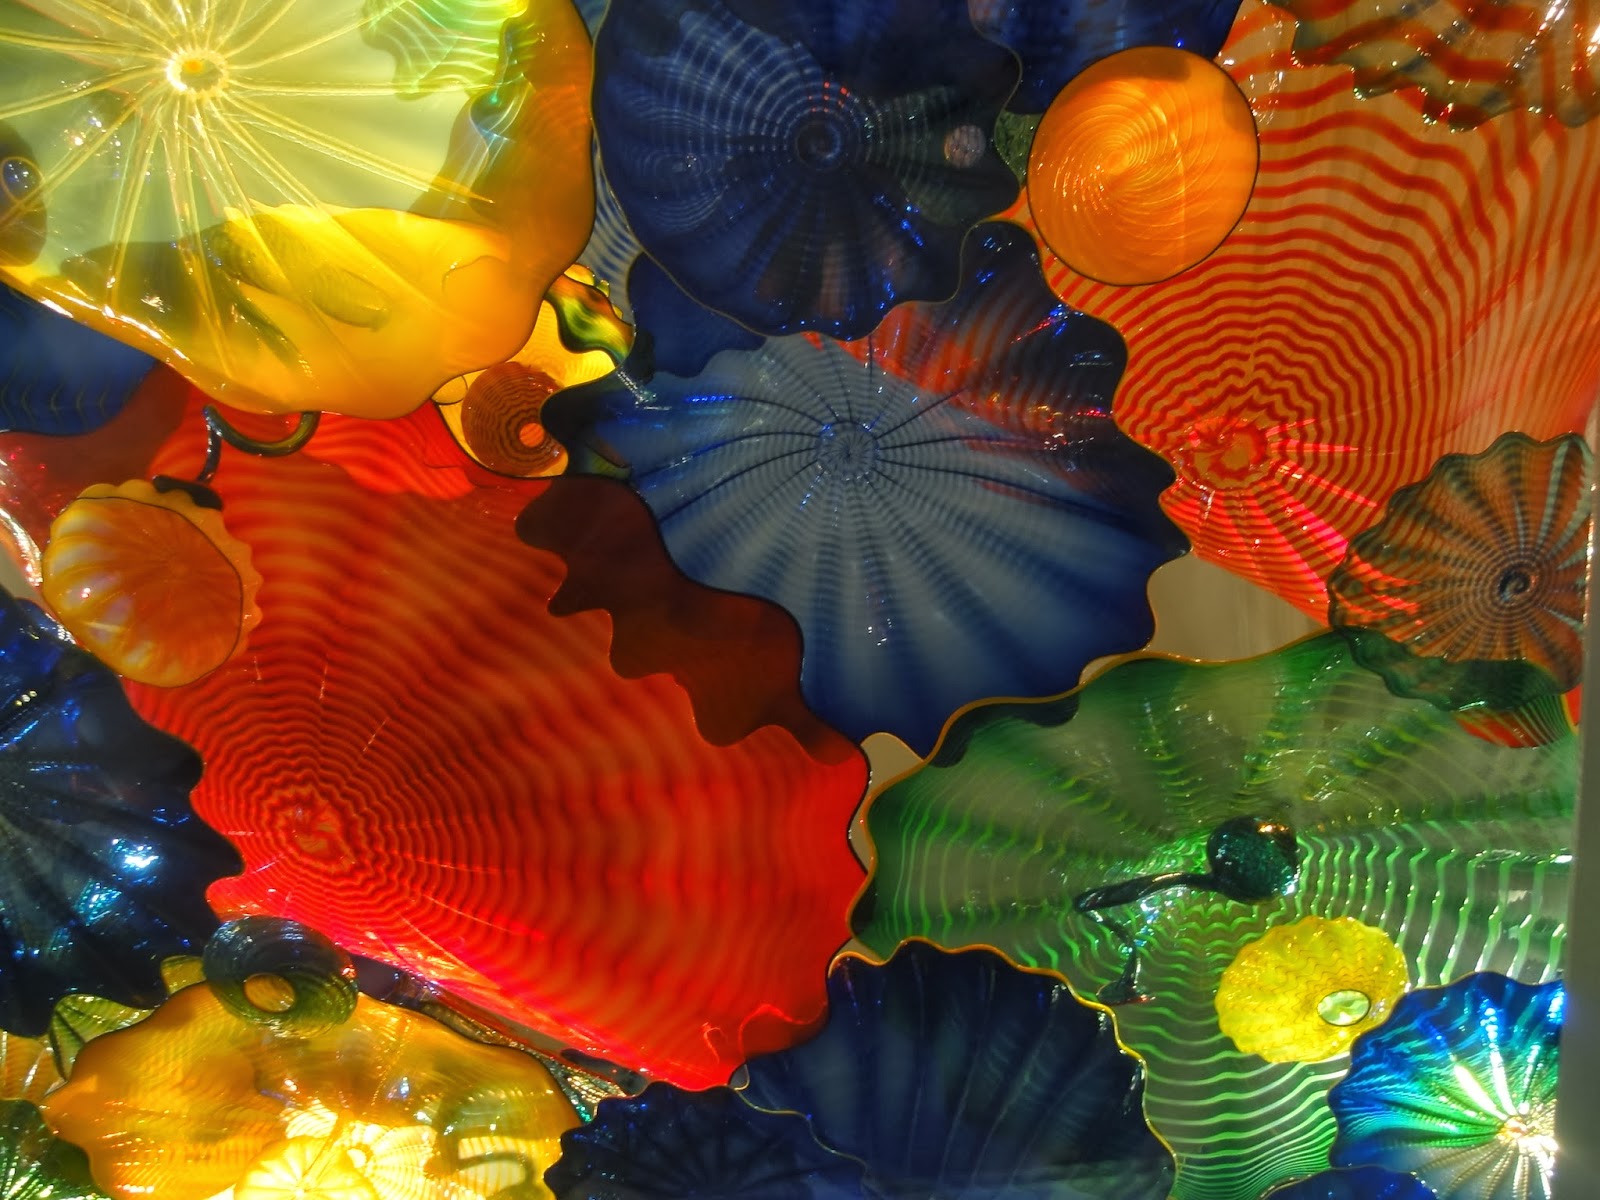
Chihuli Exhibition

   Dale Chilhuli Beyond the Object
   Halcyon Gallery 144-146 New Bond Street London 8th Feb-5th April

The videos below show the stunning glass ceiling just inside the entrance of the gallery. It is lit from above and is a delight of vibrant colours to pass beneath, to walk around and to see from above.


                                                 Ikebana

                               I like the glowing reds yellows and oranges of this one.

                                          and the reflections on the wall from these


                                            Chandeliers


                                back under the ceiling.