Tessa Spanton SWA Artist, tutor, writer


TESSA SPANTON SWA ARTIST, WRITER AND TUTOR

Welcome to my blog.
This is where I write about some of the things that inspire my work,
news of exhibitions and works in progress

Thursday, 11 December 2014

Poinsettias on Silk Greetings Cards


                                     Poinsettia on silk (c) Tessa Spanton


Silk Painted Greetings Cards Demonstration
I have written a step by step demo for Leisure Painter magazine Jan 2015 out Dec 6th on painting poinsettias on silk for greeting cards. The magazine is also available to buy online as a PDF from here

Silk Painting Starter Kit
I have also put together a kit with the basics needed for this project coming in at under £10.
The kit would be ideal for beginners, adults or children and would make a nice little gift or stocking filler.
 Update the kit is no longer available to buy from Silkcraft but the component parts are:  Silkcraft's own make ironfix paints, silk, gutta, and freezer paper. If you phone and explain I am sure Alison can help. 01246 290179
They are also available to buy at my classes.

The kit contains 3 mixable silk paints, some silk, backing paper for mounting the silk to for working on, gold outliner and a card mount. There is plenty of paint to make several cards or other projects.
You can add to the order for no extra postage, if you want more card mounts these are available to but or you could use plain card instead. Although not needed for this project a bottle of pink iron fix paint would be a useful addition for other projects.
There are full instructions in the article.

Tuesday, 2 December 2014

A Round the World Blog Hop


My latest work  Hand painted Silk Scarf Poppies steam fixed in the microwave and for sale on etsy here

Cath Stonard whose blog is stitchclothcolour invited me to follow on from her post.
http://stitchclothcolour.blogspot.co.uk/2014/11/around-world-blog-post.html

It must be about 30 years ago that I met Cath. I was in awe of her watercolours and book illustrations. Years later we met up again at The Corner Gallery in Carshalton Beeches where we both show our work. Cath had moved on to working with textiles, quilting, embroidering, embellishing with the same creative energy and flair as I saw in her watercolours. I have just bought 2 of her works from the Corner Gallery.
We both started blogging at around the same time so I keep in touch with what she's making there and now through our Facebook pages too. As you will see if you hop on over to her blog she's full of new ideas and now working more in the direction of mixed media.

I have loved drawing and painting from an early age. I remember drawing on the wall paper behind the door when I was about 4 and then hoping my parents wouldn't notice, they did. From my teenage years I rummaged through the markets in the Midlands for dressmaking projects and have been a bit of a farbricaholic ever since. For years I have painted watercolours and then took up silk painting. It combines my love of painting and working with textiles.
Yesterday I painted 3 new silk scarves. One of them I sold online via my shop on  etsy, one of them is in the Corner Gallery and the other is shown at the top of this post.
I am also experimenting with marbling techniques on silk.


Much of the time I am dreaming up new ideas or collecting new art materials or techniques. I work on things in bursts and like to have a few juggling balls in the air, juggling between painting, writing and teaching watercolour and silk painting. When the classes are on holiday I might focus on creating a group of paintings for an exhibition and also have more time to go out collecting reference by looking, sketching, painting or taking photos.

This brings me on to the  bloggers that I would like to nominate, do hop on over to have a look at their blogs

I first met Helen when I went to her for lampwork lessons. I was fascinated by the process, admired her gorgeous beads and made some of my own which I wrote about here 
Her crafting began with tiara making and she now quilts, paper crafts and teaches these skills so do hop on over to her blog to find out more.

The next blogger to introduce is Stephanie Guy http://www.stephanieguy.co.uk/

I met Stephie online through Folksy, where we both have shops. Stephie paints and over the 2 or 3 years I have known her the paintings have got smaller and smaller. She is currently writing a series of articles for a magazine about how to paint little paintings for dolls' houses. Stephie's post will be in January.

I would also like to include Andrea Neidle whose blog is called My Life in Poems https://andreaneidle.wordpress.com/2014/11/24/my-favourite-blogs/

I met Andrea  on holiday a few years ago and we exchanged blog addresses. Her poems gently gather up into words some of the times in her life, sometimes celebratory, poignant or moving that resonate with some of the times in my life.
You may have heard her reading her poems on the radio.
Andrea nominated my blog for the Leibster Award.

Sunday, 30 November 2014

Steam Fixing Silk Dyes


'Roses'  long silk scarf was steamed using the following method.


This process can be done on your hob and is similar to steaming a Christmas pudding.

 IMPORTANT If you have used coloured waterbased outliners (guttas) dry iron first to fix the colour in the outliner. otherwise it will probably run. Dry iron on medium heat for several minutes.

To steam fix dyes into silk, lay the dry silk onto a piece of cotton that is larger than the piece of silk, tuck the extra in over the silk and loosely roll it up like a Swiss roll. If you don’t have cotton, use tissue paper instead. This is to ensure that no one part of the painted silk is touching another before the colours have been fixed.

Curl this round like a Danish pastry so that it will fit the steamer.

Some silk painters make a foil cap to cover the bundle, I prefer to wrap it in foil, a bit like a Cornish pasty, crimping the foil together at the top to keep water droplets out.

Place the parcel crimp side down in a steamer or on a trivet or upturned bowl in a pan. Add some water making sure that it doesn’t touch the parcel. 
How long you steam for depends on the size of the item. I would give a long scarf about an hour and deep colours or several scarves together longer, up to 3 hours. Some makes of dye eg Marabu need the full 3 hours.

Important, check the water level regularly and top up. I set a timer for 30 mins and then check. If it boils dry the silk might scorch.
When you remove the silk from the parcel take care as it will be very hot.

Rinse to remove any excess dye, blot between towels then iron while damp.
If you used salt for effects it is important to rinse the scarf well to remove any traces of salt as this can over time rot the silk.


Have fun!

Sunday, 26 October 2014

Painting Picture Frames


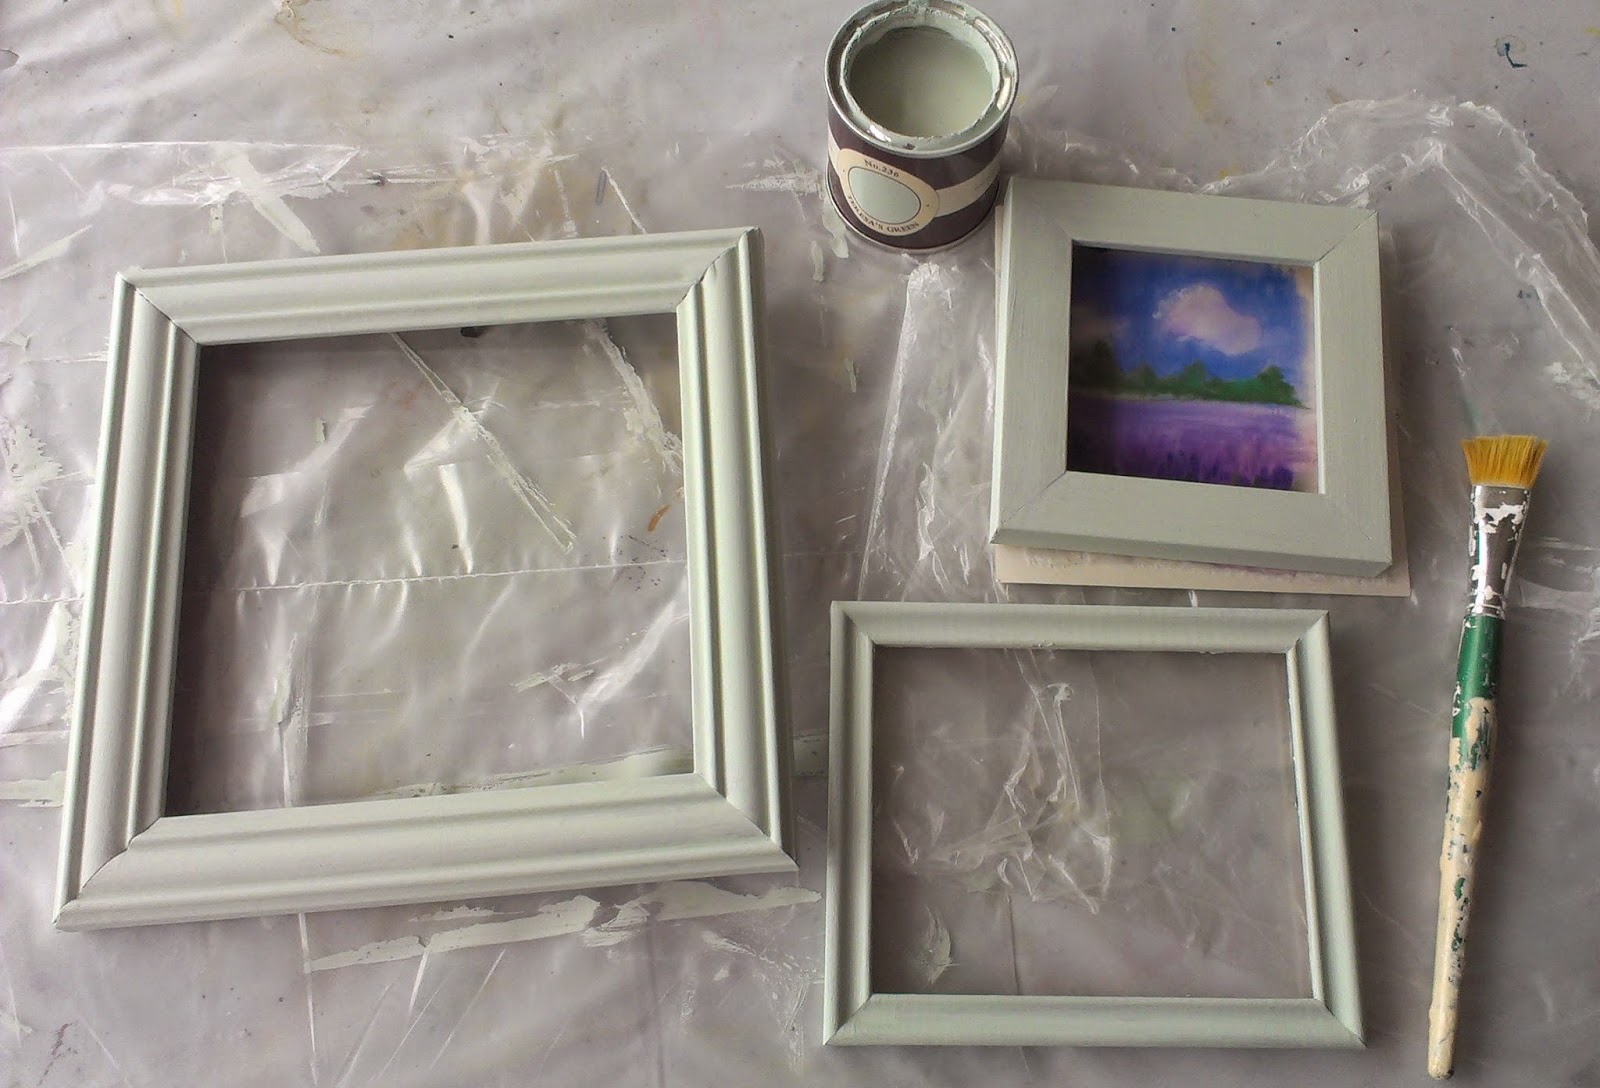
I am painting a few picture frames ready to frame some small works for The Corner Gallery's gifts for Christmas show.
I am using Farrow and Ball's emulsion paint. First I sand the surfaces to be painted and dust them down. I use an artist's flat brush. It takes up to 3 coats depending on the original colour of the frame. It gives a lovely velvety matt finish. The colour I am using this time is Teresa's green. It's a very soft grey green that goes well with lots of my paintings. This group will mostly be the local lavender fields painted on silk. I buy a sample pot which goes quite a long way on smallish frames.

Tuesday, 21 October 2014

Silk Scarf yellow and grey geometric pattern

I have used AV Vallejo black outliner and Marabu iron fix paints on a ponge 5 scarf. I worked on both ends in turn until the design met in the middle. It was not drawn out first but evolved as I worked on it.


A close up of one end


The ready hemmed blank silk scarf is attached to an Arty's Easyfix frame while being worked on.
Both are available to buy by mail order from Silkcraft click here for the frames and here for the scarves.

I find this type of frame is useful for painting scarves. I have a square frame and an extension kit. The system is flexible and can be set up for different sizes of scarf, oblong or square. The silk is held away from the frame rather than pinned onto a wooden frame which means that ready hemmed blank scarves can be painted right to the edge.
I find it a bit fiddly to set up and for work where the edges will not be seen prefer to use a wooden frame.

TIPS  Don't make the rolled edge too wet.  Be on the look out for moisture from the rolled edge moving into the drying scarf and making watermarks.
 I painted this scarf in small sections and dried them one at a time with a hair drier. This has to be watched too as one colour can spread along inside the rolled hem and get into the next section.


                                                       Finished scarf  135x35cm approx


Friday, 12 September 2014

Painting Outdoors Smart Tools


The second of my two articles about painting out of doors is in the October issue of the Leisure Painter magazine which is out today. 
I show how to scale up and how to make some simple tools, a viewfinder to help with finding a composition and an angle finder for measuring angles, useful when drawing buildings.
The magazine can be bought from larger newsagents or online here and is also available in digital form.


Sunday, 7 September 2014

florum 2014


There is a YouTube video of the exhibition made by Katherine Tyrrell with permission from florum
here and a review on her blog Making a Mark here

I have 7 paintings and some prints and cards
in florum's exhibition.It is on till Sept 13th 
more details click here


White Dahlia  an original silk painting by Tessa Spanton (c)


 Himalayan Poppy  an original silk painting by Tessa Spanton (c)


 Rose Burgundy Ice an original silk painting by Tessa Spanton (c)

 
Darwin tulip an original silk painting by Tessa Spanton (c)


Iris ensata  an original silk painting by Tessa Spanton (c)


Iris spuria an original silk painting by Tessa Spanton (c)


Hellebores an original silk painting by Tessa Spanton (c)