Tessa Spanton SWA Artist, tutor, writer


TESSA SPANTON SWA ARTIST, WRITER AND TUTOR

Welcome to my blog.
This is where I write about some of the things that inspire my work,
news of exhibitions and works in progress
Showing posts with label silk painting kit. Show all posts

Sunday, 13 February 2022

Silk Painting for Beginners


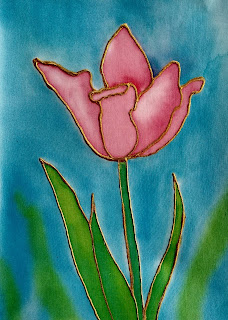
In 2018 I wrote a step by step demo for Leisure Painter magazine on painting tulips on silk.
Silkcraft put together a kit that is still available here see image above.
 
I also teach silk painting via zoom if you are interested please contact me at www.tessaspanton.co.uk
 
Usually I mount silk to a frame before painting. It is also possible to iron the silk onto freezer paper before painting which is handy if you want to make cards as you can stick the whole thing into a blank trifold aperture card.
 
If you don't have freezer paper you could stretch the silk over a microwavable take out container, plastic tray from a ready meal, back of a small picture frame or even a cardboard box. Fix with small pieces of masking tape at the edges.

Below is one of my photos that I provided for the article. It is  available for you to use for this project.
 

Iron the silk onto the freezer paper. Draw the tulip with a soft pencil or fade away pen.
if you are not confident with drawing print out the photo. The silk is thin enough to use like tracing paper. trace the outline first the iron onto teh freezer paper.

  GUTTA TECHNIQUE 

Paints or dyes spead on wet or dry silk. Gutta or outliner makes a waterproof line that stops the paint spreading beyond the area you want to paint.

 Practise drawing gutta lines on a piece of paper first. To avoid a blob at the beginning of the line, hold a small piece of paper on the place where you want to start, begin there and move smoothly onto the other piece of paper. If you get a blob further down the line you can gently lift off some of the gutta using a small, slightly damp paintbrush. I prefer some irregularities or variations in the gutta lines as I feel it gives the work more character.

If the line is very fine, it may let the colour through when you come to paint the silk. If it is too thick it will take longer to dry.

Leave till thoroughly dry.


EXPERIMENTS WITH COLOUR

 Have fun with colours and get a feel for painting on silk, you could turn these samples into greetings cards.

  U     Use a wet paintbrush dampen the silk. Don’t make it too wet, just touch the brush to the silk and watch it absorb the water. Then put colours onto the damp silk and watch them flow and blend. 

O  OR Try brush marks of red and yellow on dry silk. Put one colour next to the other, run one colour over another. Leave to dry then overpaint with more brushstrokes.

O


Below the red was diluted with water to make a pink, The background was made damp before painting with diluted blue.


Thursday, 11 December 2014

Poinsettias on Silk Greetings Cards


                                     Poinsettia on silk (c) Tessa Spanton


Silk Painted Greetings Cards Demonstration
I have written a step by step demo for Leisure Painter magazine Jan 2015 out Dec 6th on painting poinsettias on silk for greeting cards. The magazine is also available to buy online as a PDF from here

Silk Painting Starter Kit
I have also put together a kit with the basics needed for this project coming in at under £10.
The kit would be ideal for beginners, adults or children and would make a nice little gift or stocking filler.
 Update the kit is no longer available to buy from Silkcraft but the component parts are:  Silkcraft's own make ironfix paints, silk, gutta, and freezer paper. If you phone and explain I am sure Alison can help. 01246 290179
They are also available to buy at my classes.

The kit contains 3 mixable silk paints, some silk, backing paper for mounting the silk to for working on, gold outliner and a card mount. There is plenty of paint to make several cards or other projects.
You can add to the order for no extra postage, if you want more card mounts these are available to but or you could use plain card instead. Although not needed for this project a bottle of pink iron fix paint would be a useful addition for other projects.
There are full instructions in the article.